Step 1: Prepare Artwork
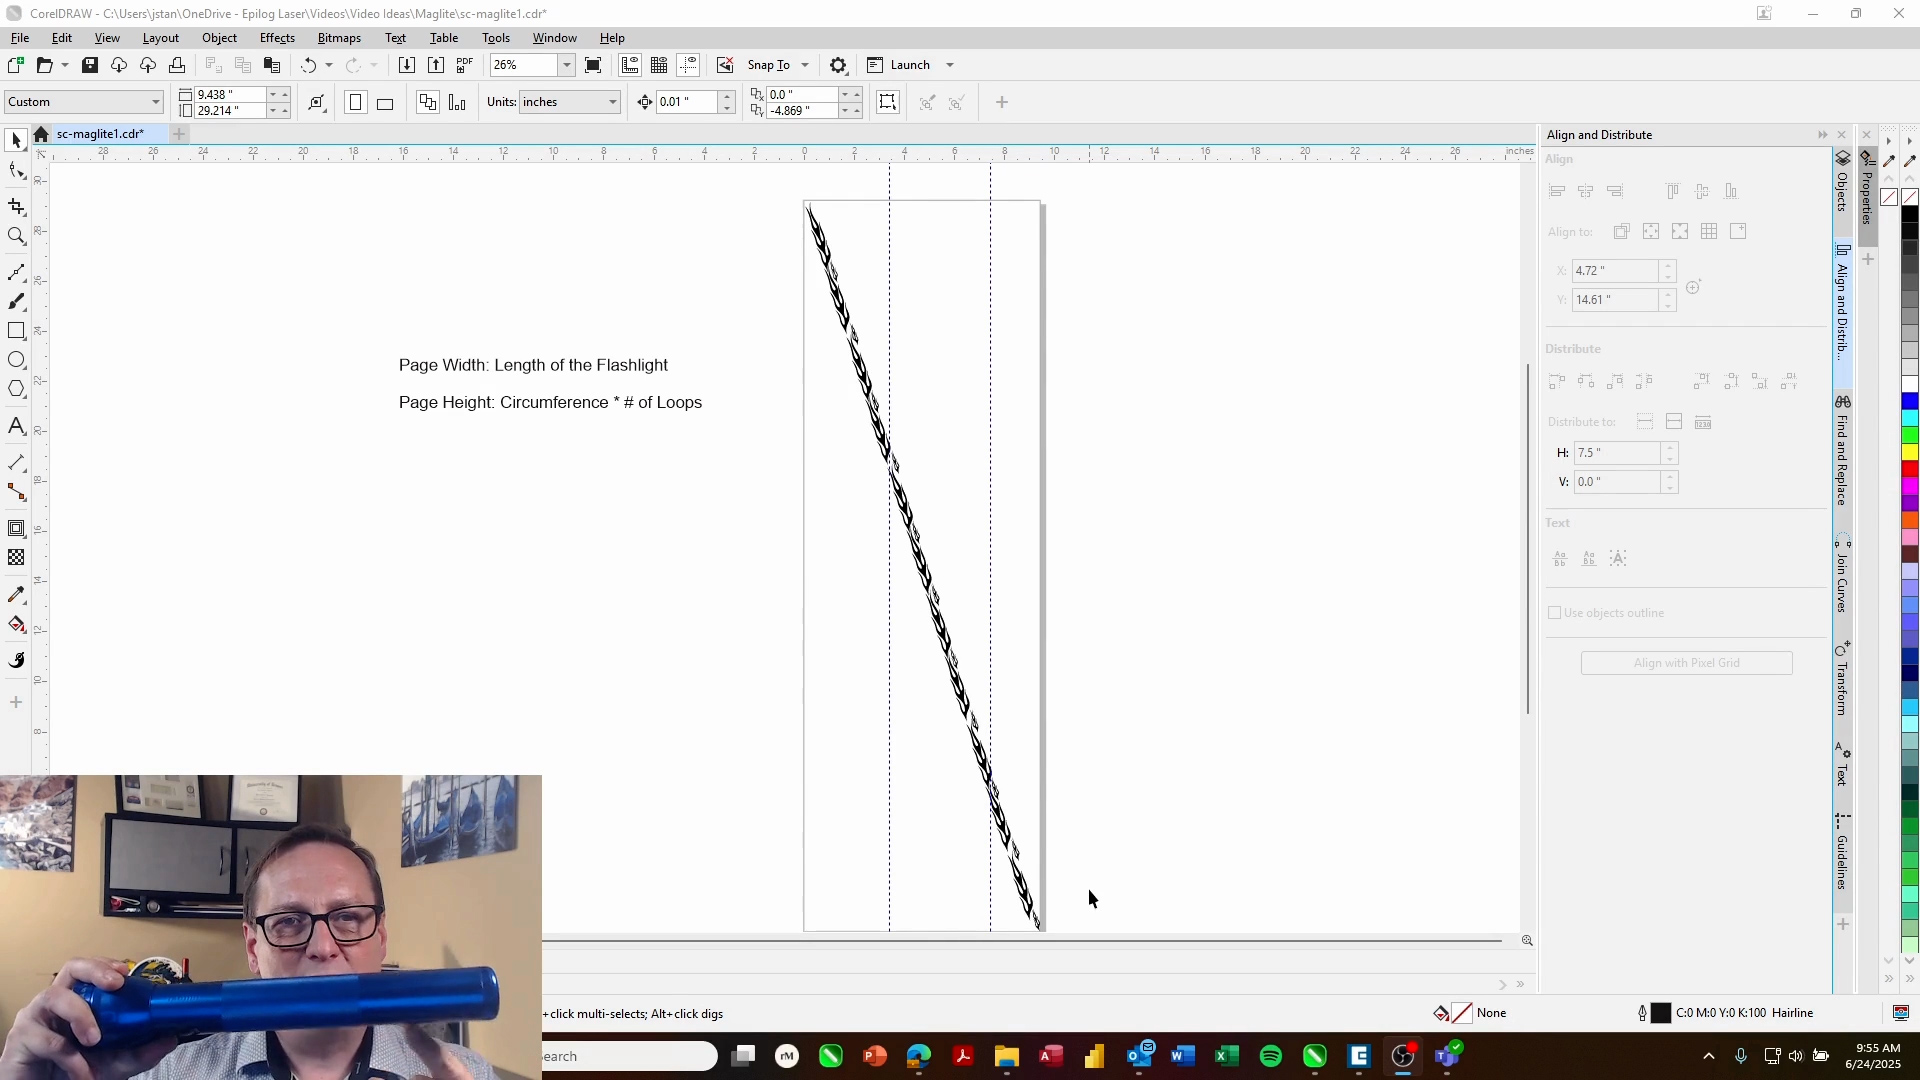
To start, in our design software we’ll set up our artwork. This design is set up diagonally across the page, so that it creates a looping effect as the flashlight turns on the rotary attachment. If you’re engraving a different size flashlight, measure the length of your flashlight and make the page width the length of the flashlight. The page height is going to be the circumference of the flashlight, multiplied by the number of loops. Print the file to the laser.
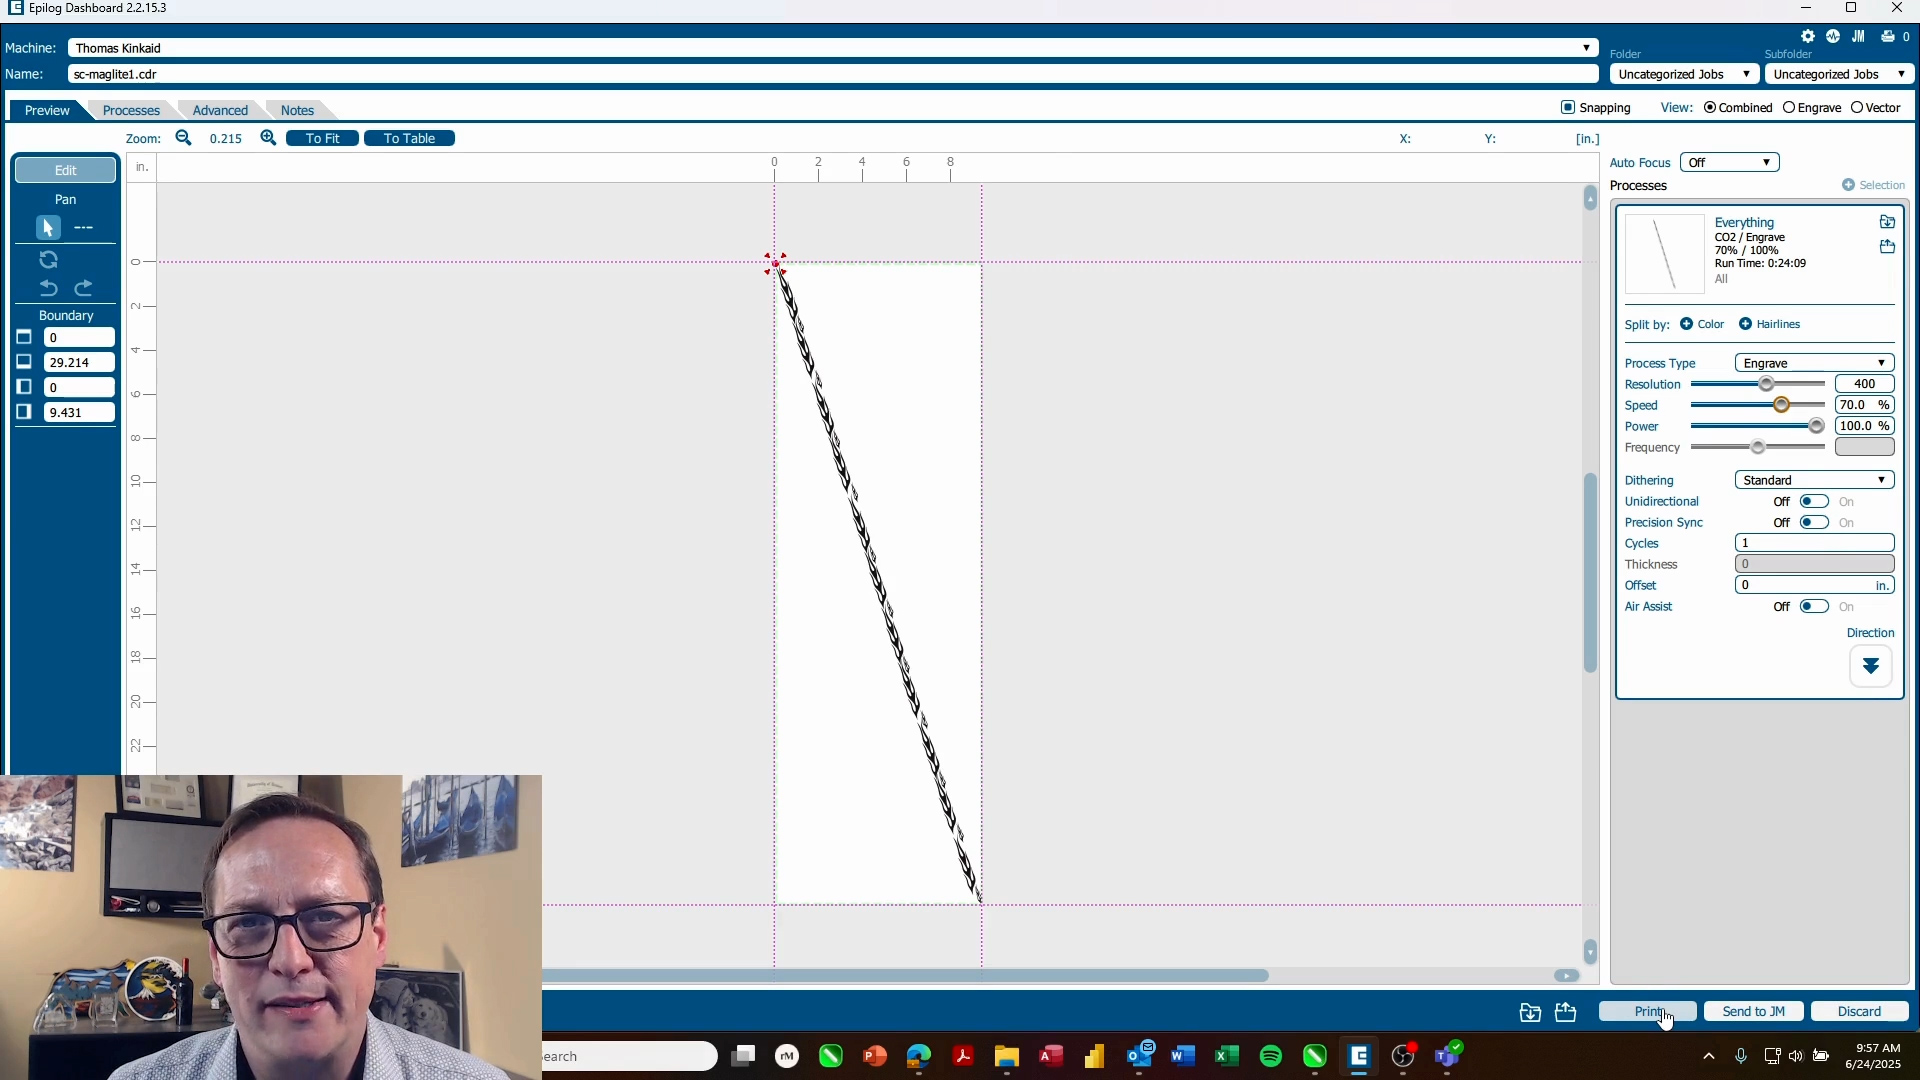
Step 2: Set up Artwork in the Laser Dashboard
In the Laser Dashboard, navigate to the “Advanced” tab. Turn on the rotary attachment setting, and set the page height to match the height of the page you set up in your design software. Set the centering point to “Top Left”.
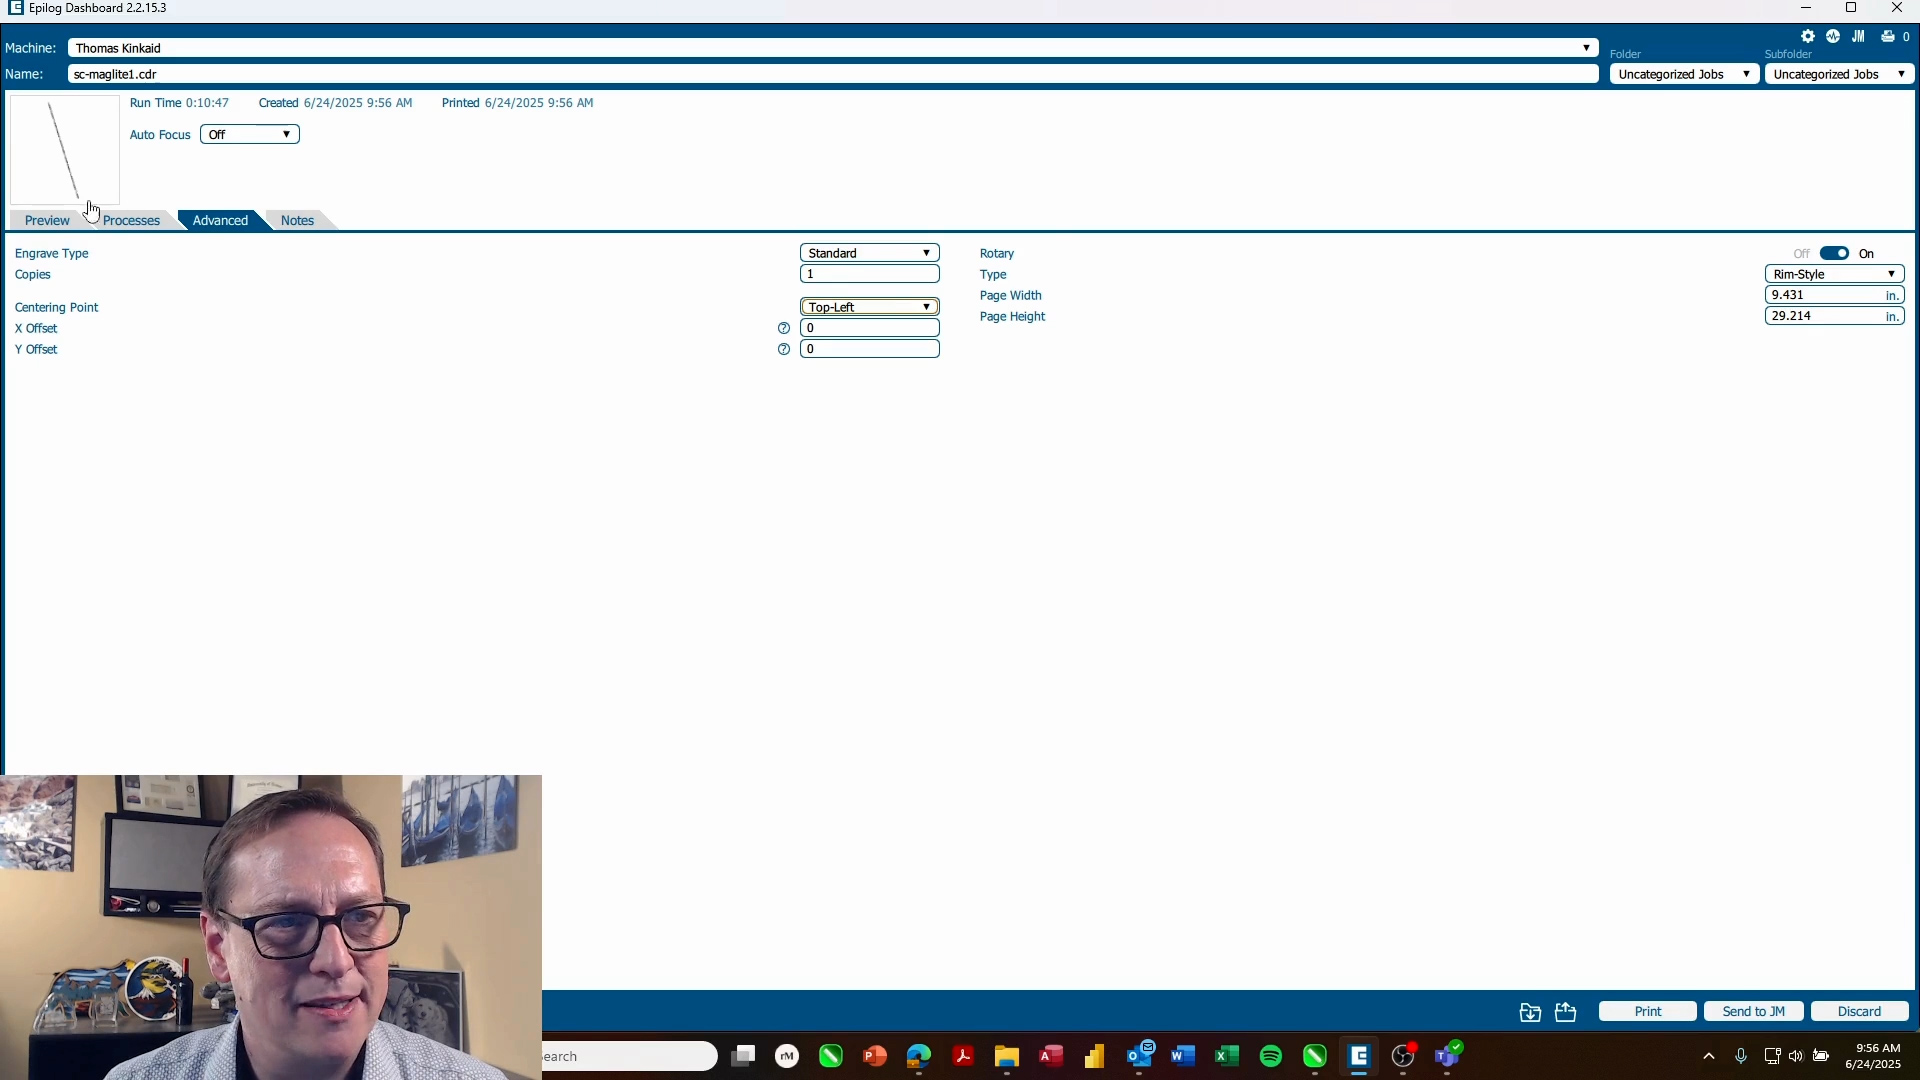
Now input your engraving settings. For this project we used a 60 watt Fusion Edge, so our settings are 100% Power, 70% Speed, and 400 DPI. Print the job to the laser.
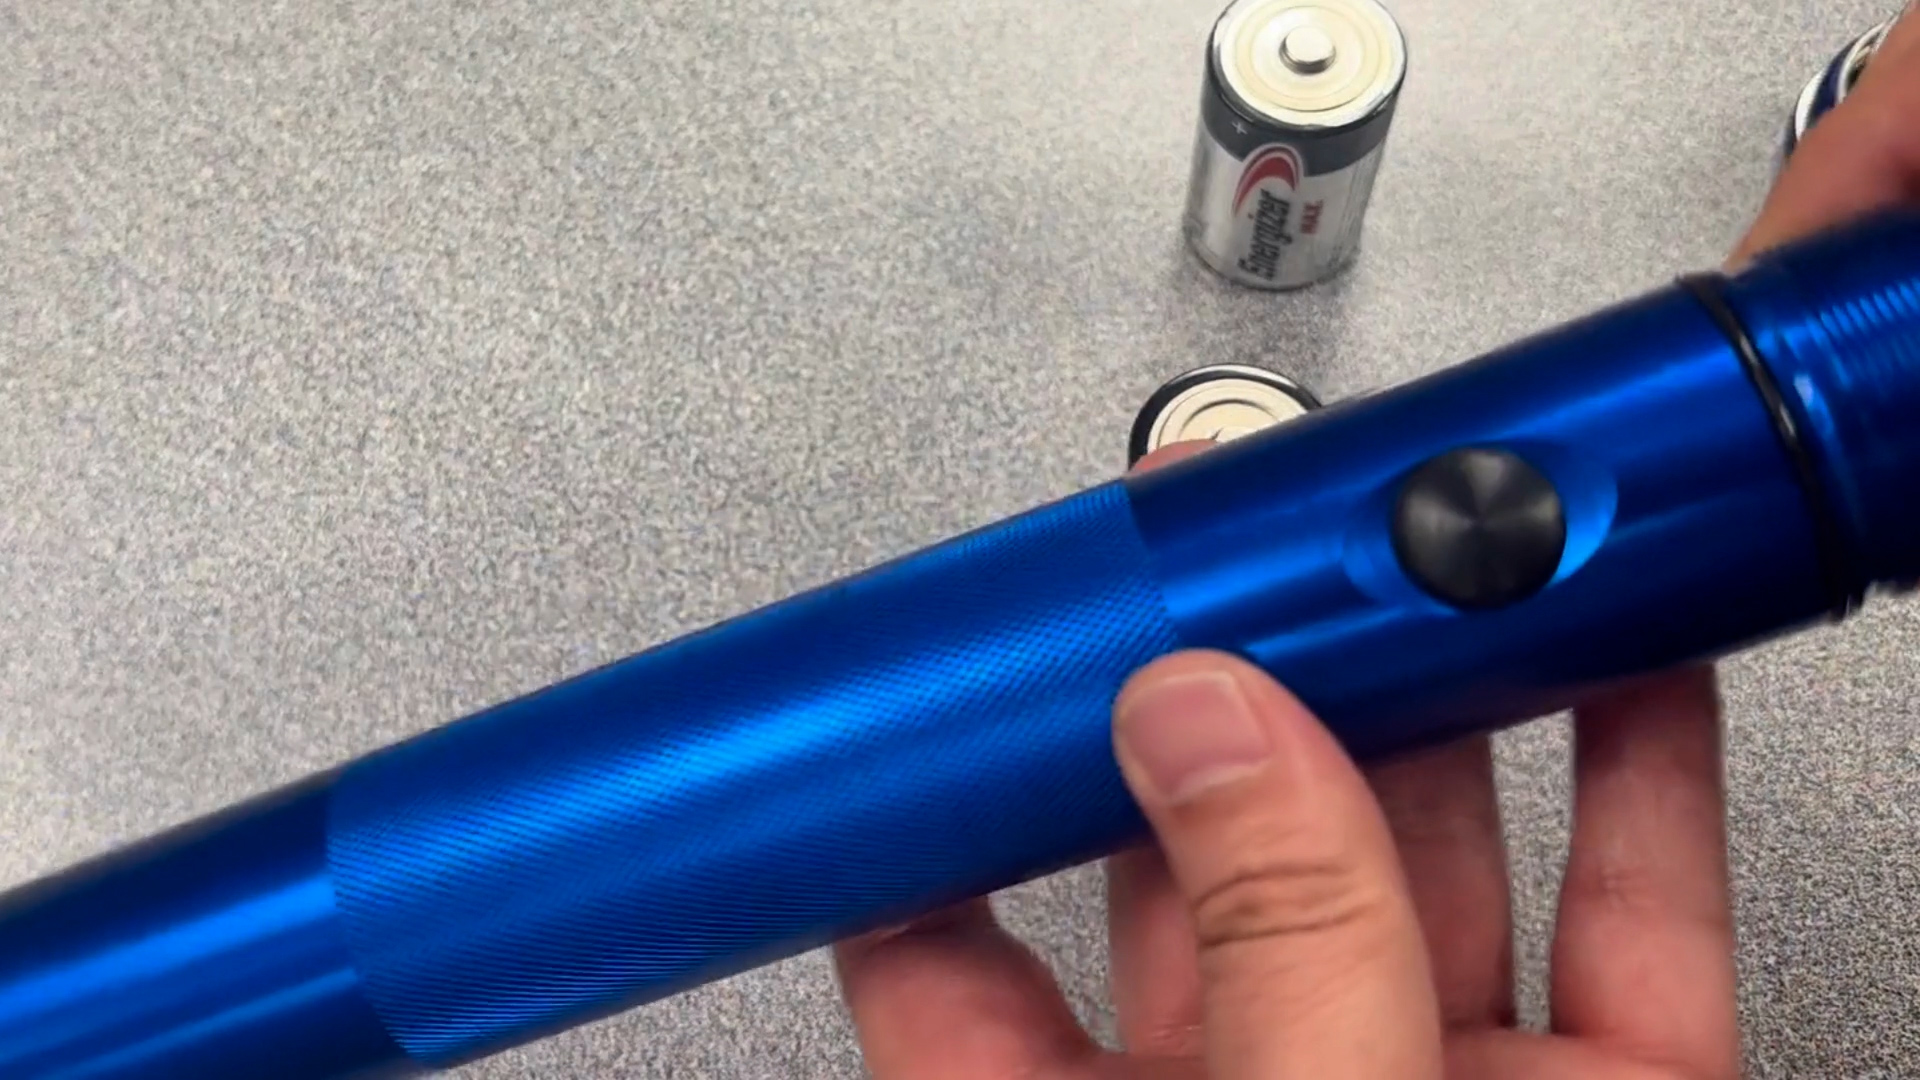
Step 3: Prepare Flashlight for Engraving
To prepare the flashlight for engraving, remove the top end so you have a flat surface while it engraves. You can also place batteries inside the flashlight to help weigh it down as it rotates.
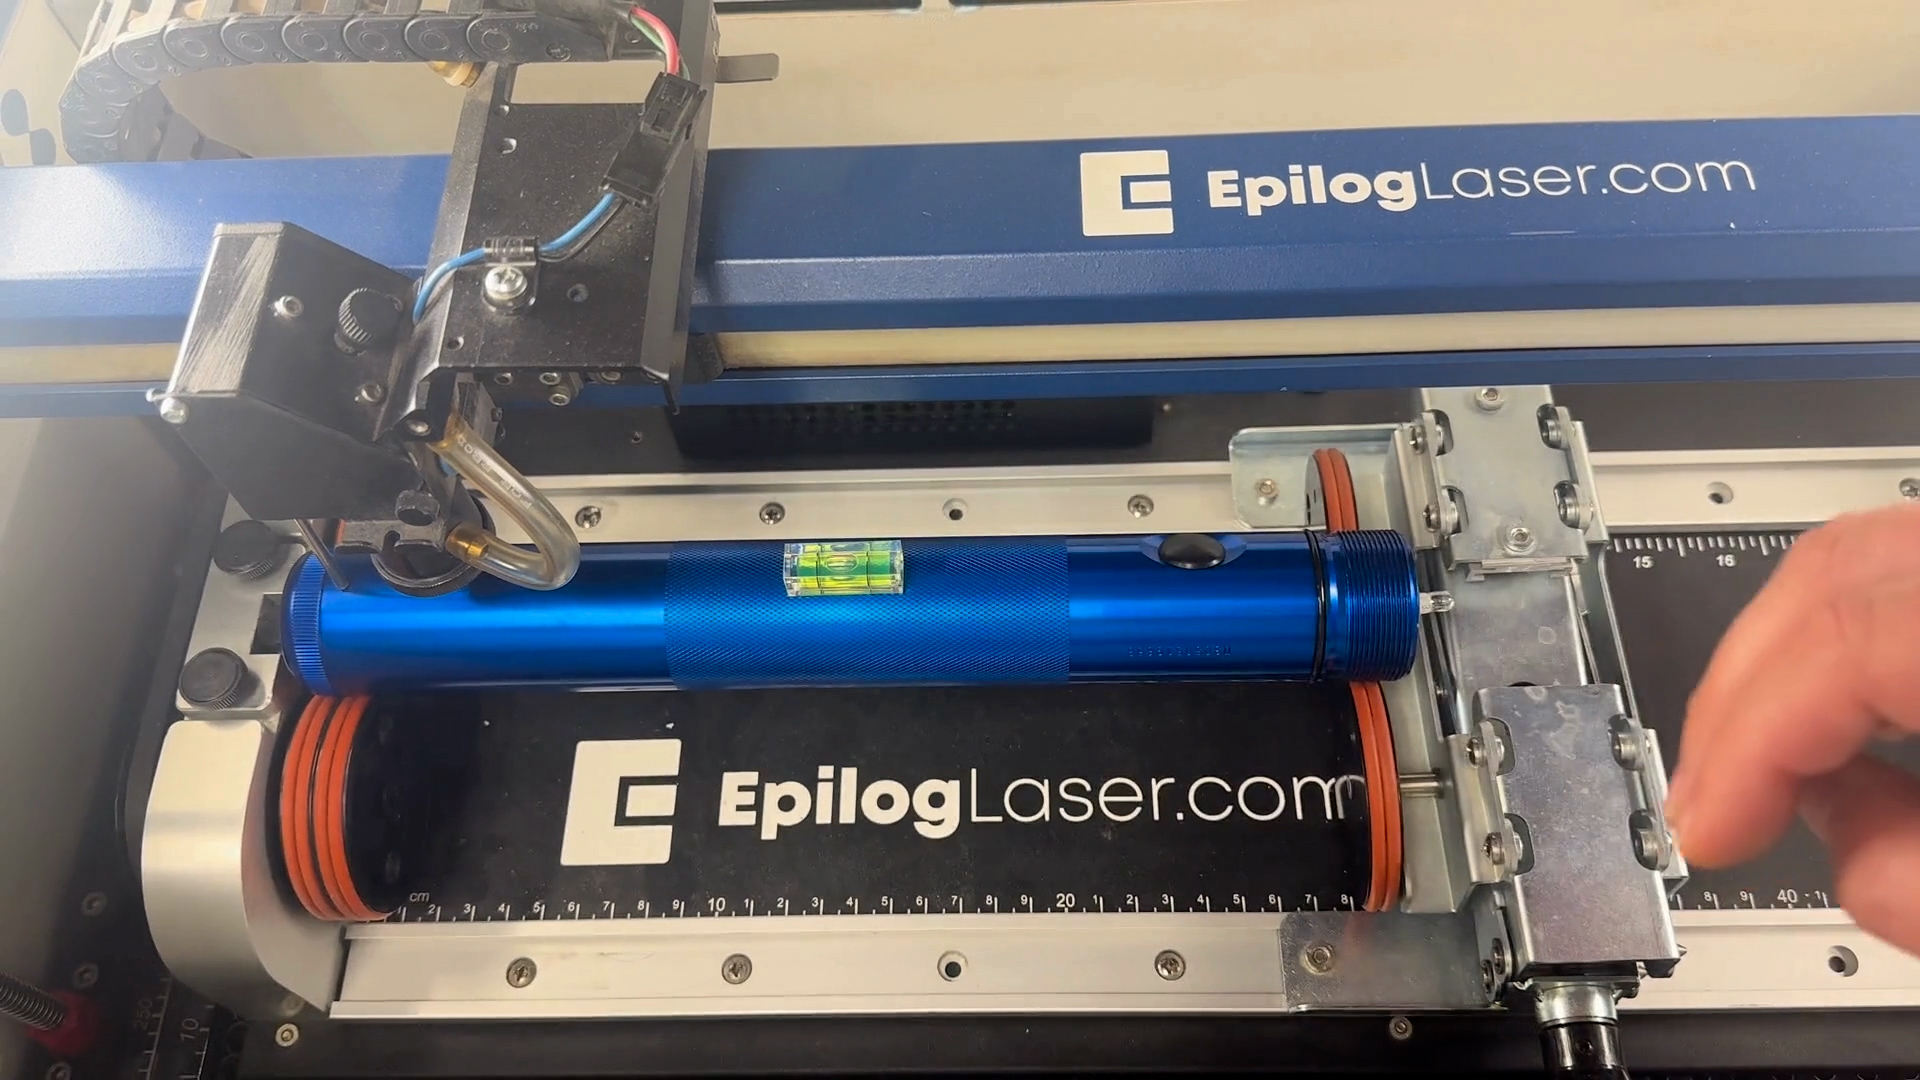
Step 4: Set Up Rotary
With the rotary attachment installed, place the flashlight on the rollers. Using the manual focus gauge, raise the table until the focus gauge touches the flashlight.
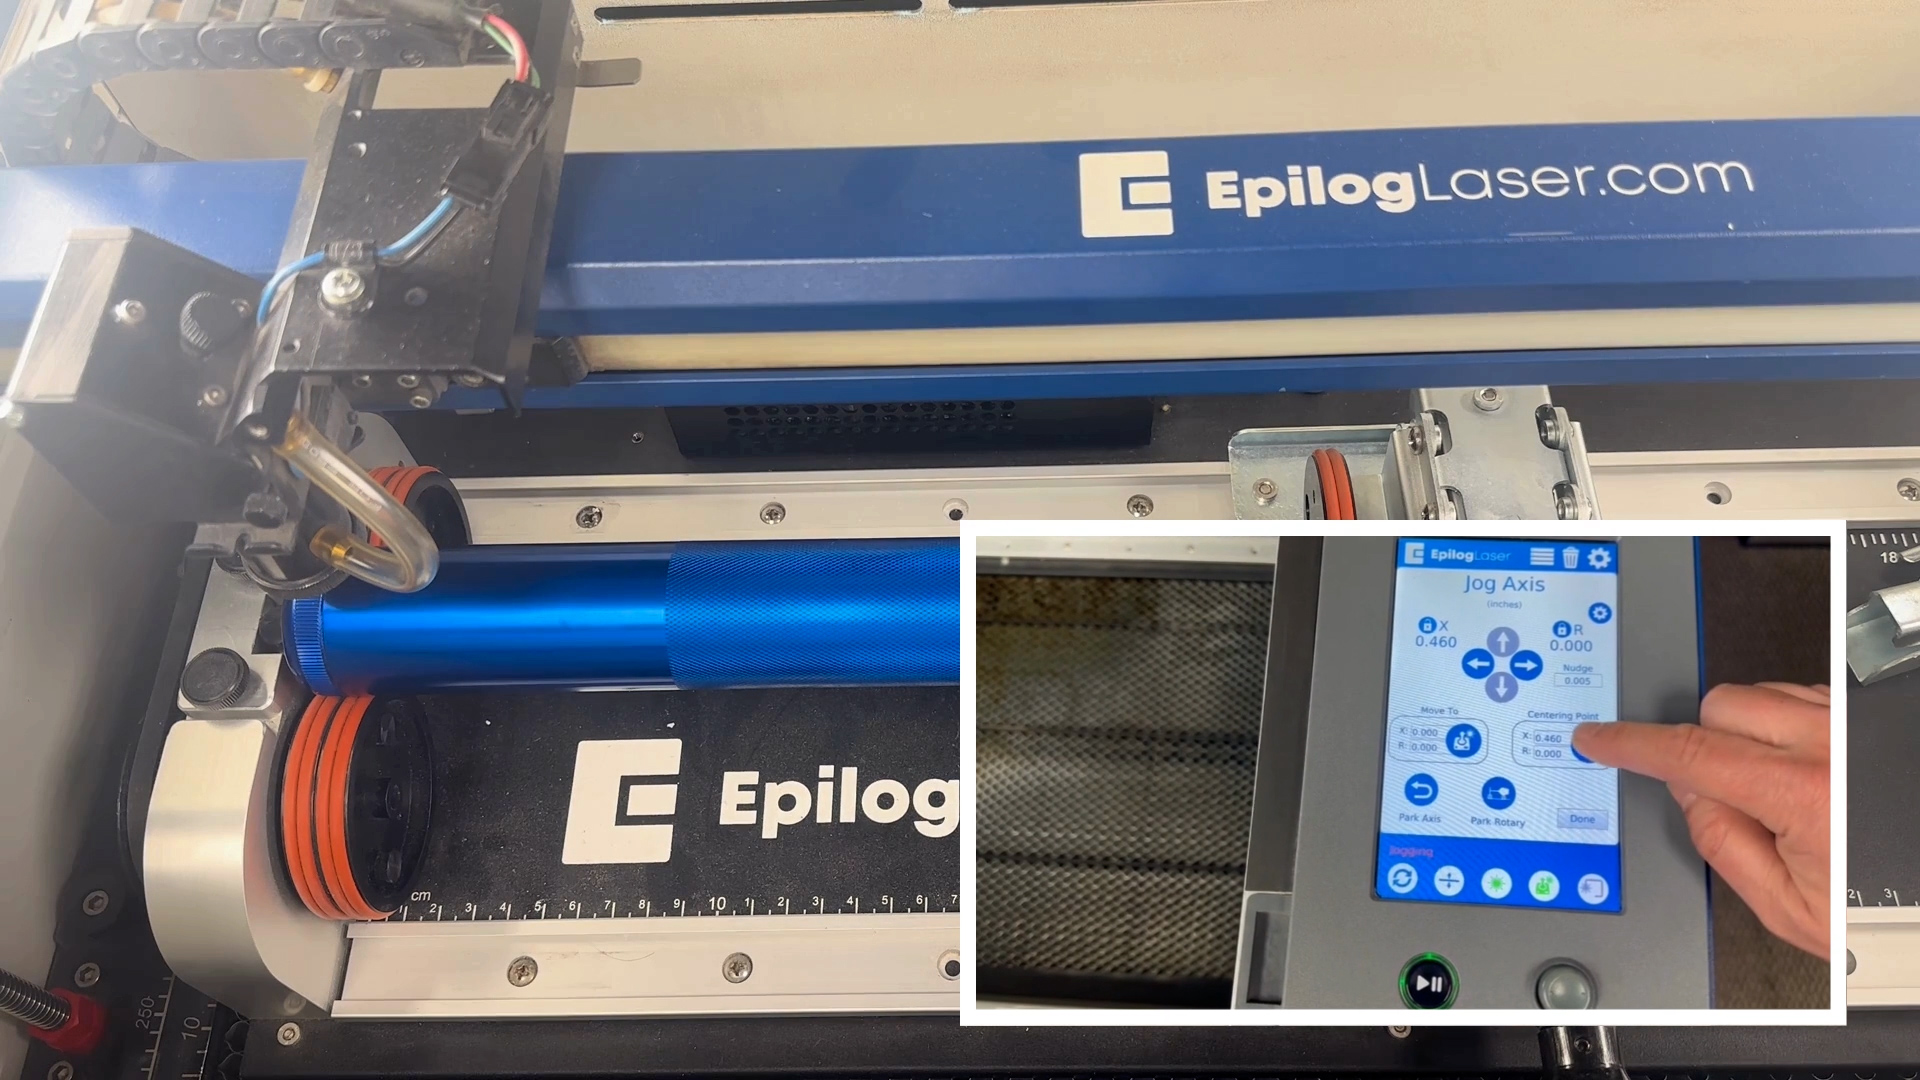
Check that the flashlight is level, then set your centering point. The centering point we chose is at the edge of the battery cap, ensuring that the button on the flashlight is facing upward, so that we don’t overlap it with the artwork.
Step 5: Run the Job
At the laser, press go and run your engraving!
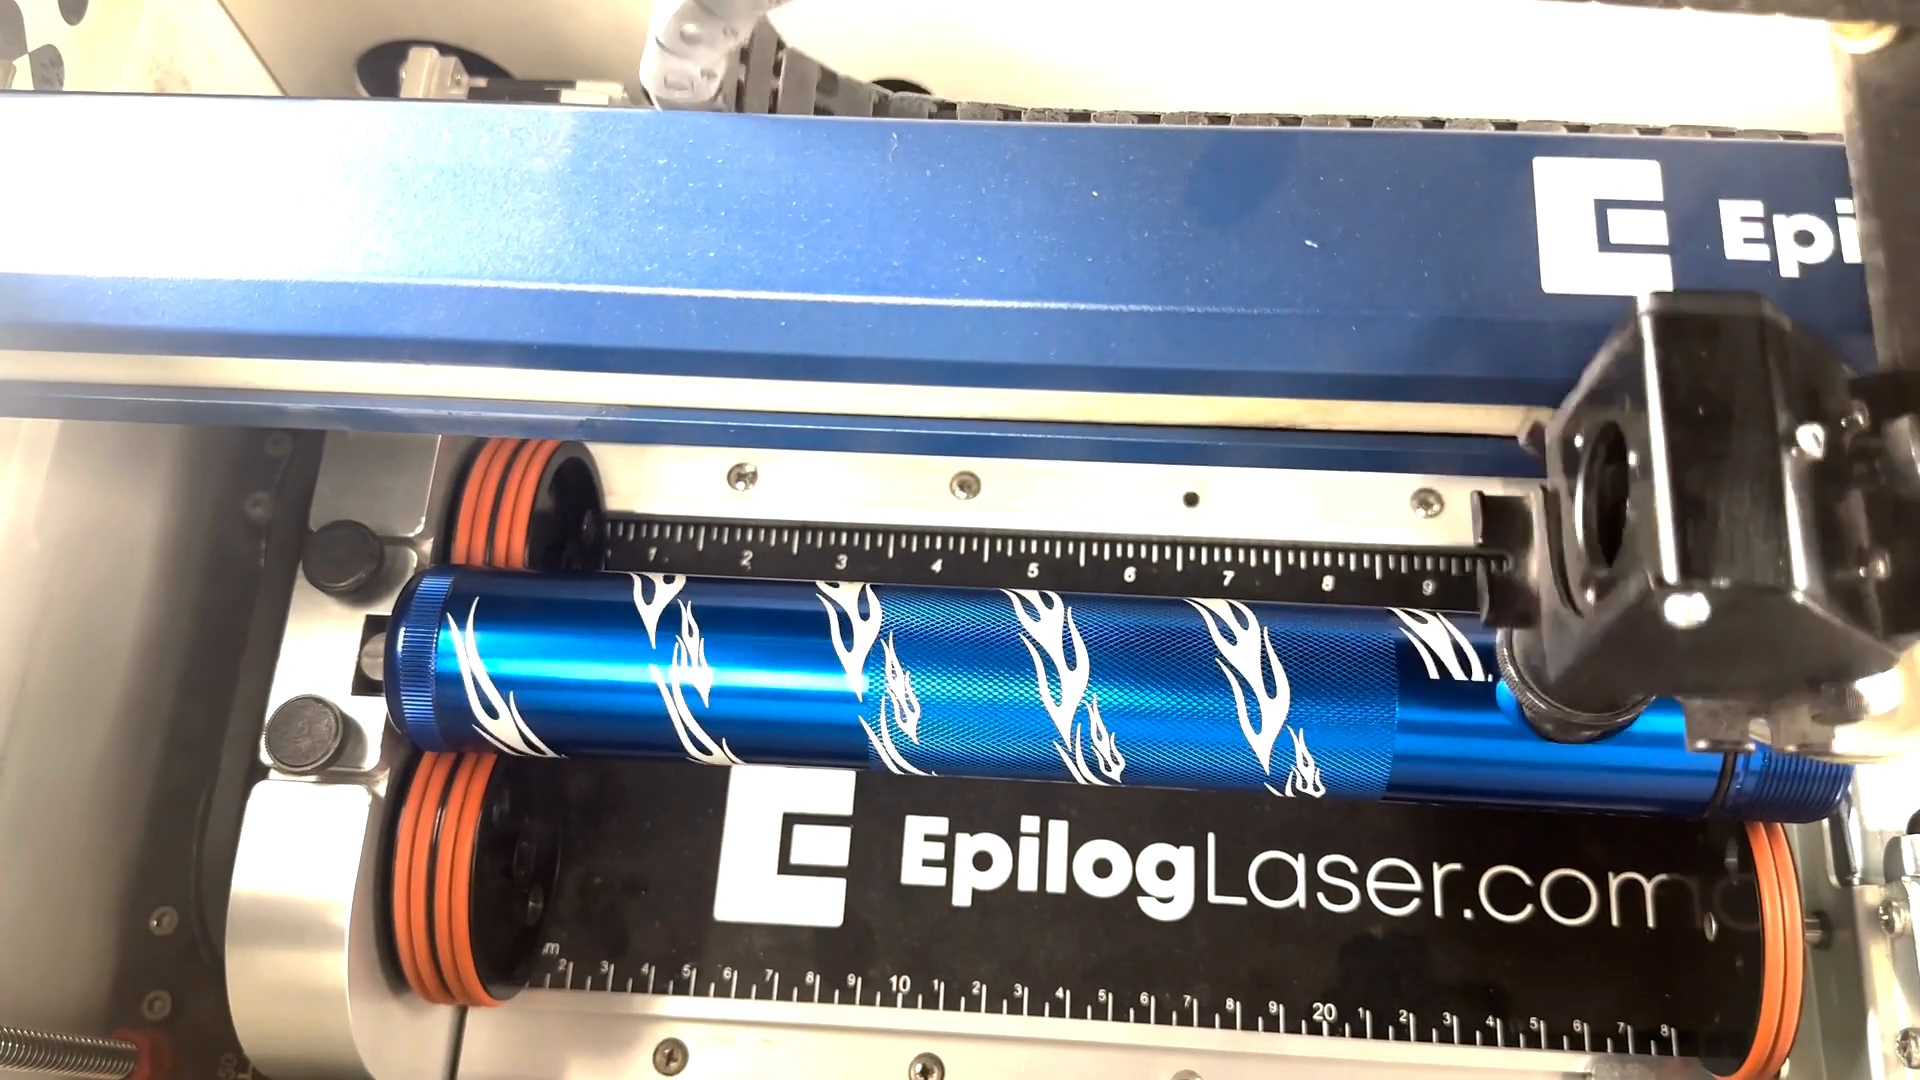
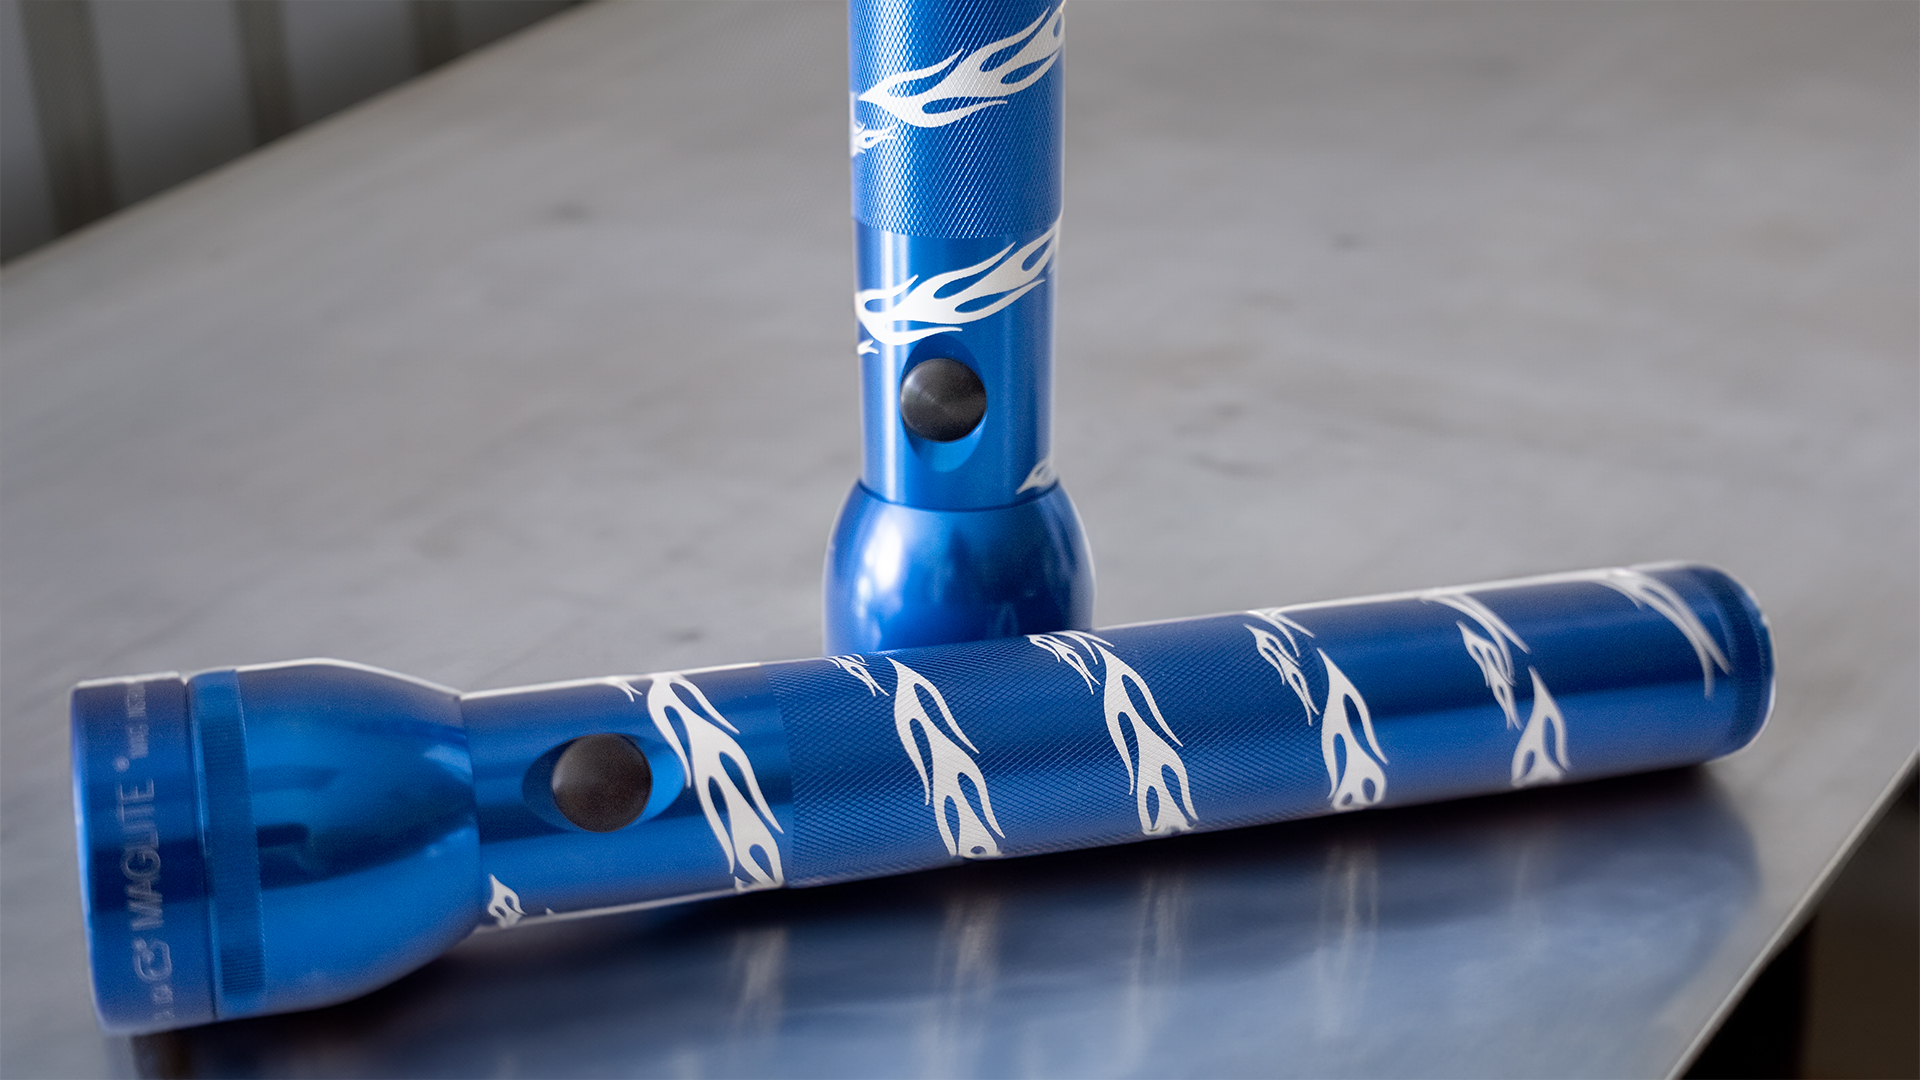
Once your engraving is finished you’ve got a stunning customized piece, ideal for a variety of audiences!
Where to sell customized Maglite flashlights?
You can sell customized Maglite flashlights through several channels depending on your target audience (corporate, retail, promotional, etc.). Here are some options:
Online Marketplaces
- Etsy
- eBay
- Amazon (via Amazon Handmade or FBA)
- Shopify Store / Your Own Website
B2B / Corporate Sales
- LinkedIn outreach
- Reach facilities managers, security teams, or event planners.
Direct Sales to Local Businesses / Government / Law Enforcement
- Offer engraved flashlights with company logos or badges.
- Popular for employee gifts or gear.
In-Person Sales
- Trade shows, flea markets, and fairs
- Tactical gear shops or outdoor supply stores


