Professional Glass Engraving: How to Get a Perfect Frosted Look on Wine Bottles
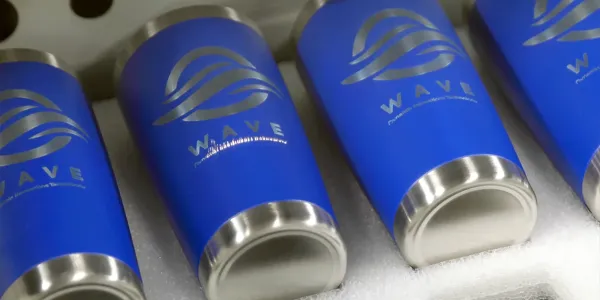
Engraving wine bottles is a staple for wedding gifts, corporate awards, and personalized celebrations. The goal is to achieve a smooth, bright white frosting rather than a rough, chipped finish. The secret lies in heat management through dot dispersion.
Phase 1: Software & Graphic Preparation
The way you set up your file determines the quality of the fracture on the glass surface.
1. Change your Shading
Instead of using 100% solid black for your graphic, change the color to 60% Gray.
The Logic: Glass is fractured by the heat of the laser. If the dots are too close together (solid black), the heat builds up and causes the glass to chip or shard. By using 60% gray, you tell the laser to leave microscopic gaps between the dots, which disperses the heat and creates a smooth, frosted appearance.
2. Sizing and Orientation
Sizing: For a standard wine bottle, a width of 3 inches is typically the sweet spot for visibility and aesthetics.
Rotation: Since the bottle sits sideways on the rotary attachment, you must rotate your graphic 90 degrees clockwise in your design software.
Phase 2: Laser Dashboard Settings
Your Epilog Laser Dashboard settings are the final step in ensuring that frosted finish.
1.DPI (Dots Per Inch)
Drop your resolution to 300 DPI. This further separates the laser pulses to prevent overheating the glass.
2. Dithering Pattern
In the advanced settings, choose the Stucki dithering pattern.
Why Stucki? Because 300 DPI is a lower resolution, a standard dot pattern might become visible. Stucki randomizes the dot placement, resulting in a perfectly even frosted texture.
3. Centering Point
Enable Center-Center engraving. This is the best way to align a logo on a cylindrical object.
4. Rotary Mode
Ensure the Rotary Attachment is toggled “On” in the Dashboard to disable the overhead camera and initialize the rotary drivers.
Phase 3: Hardware & Machine Setup
Optimize the system for cylindrical engraving
1. Installation
With the laser powered OFF, plug in the rotary attachment and place it on the bed. Power the machine on so it recognizes the attachment.
2. Leveling
Place the wine bottle on the rollers. Use the manual adjustment crank on the rotary to raise or lower one side until the engraving surface is level.
3. Focus
Move the laser head over the center of the bottle and use the focus gauge to set the height.
4. Setting the Home Position
Use the jog feature to move the red dot pointer to the exact center of where you want the logo to appear. Press the Centering Point button on the Epilog display panel to lock in your 0,0.
Business Insight: Occasion-Based Engraving Strategy
Wine bottle engraving is an incredible add-on service. For retailers or liquor stores, keeping a library of templates for specific events can turn a standard bottle purchase into a high-margin gift: