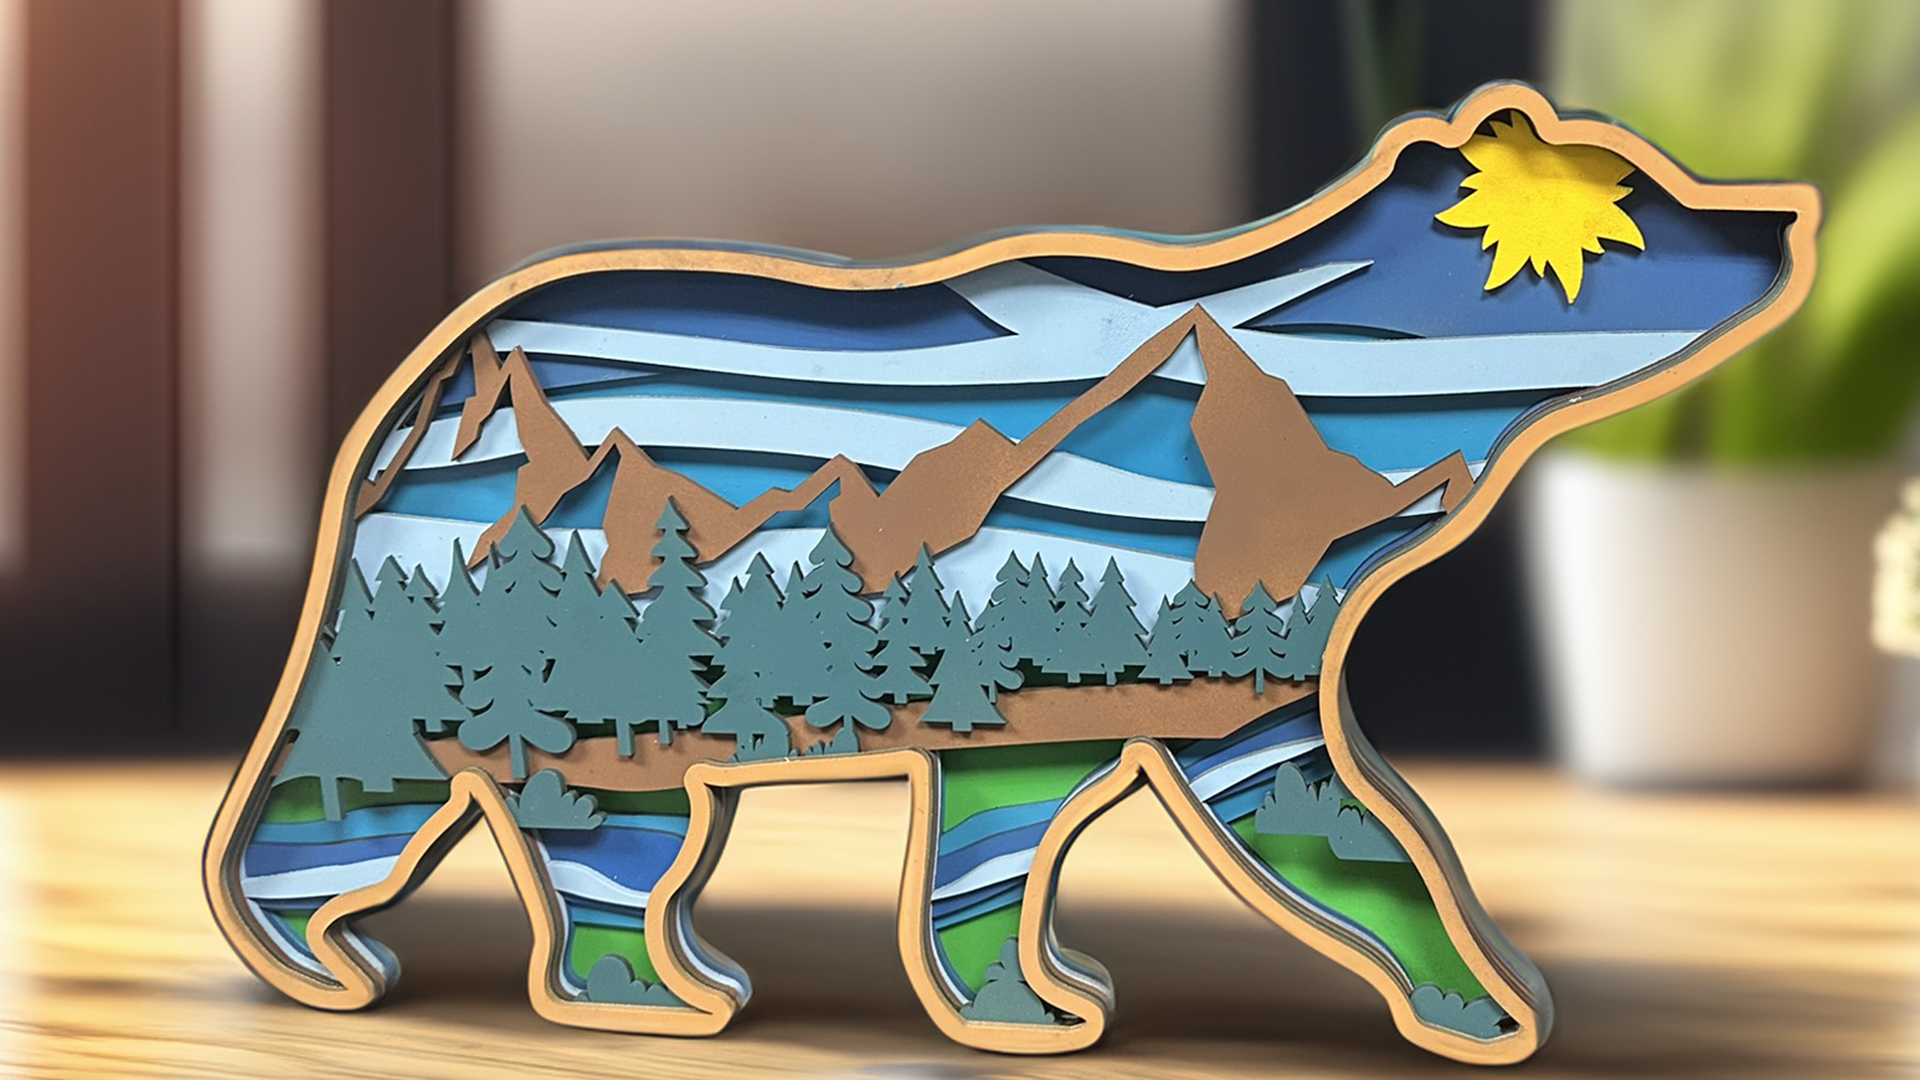
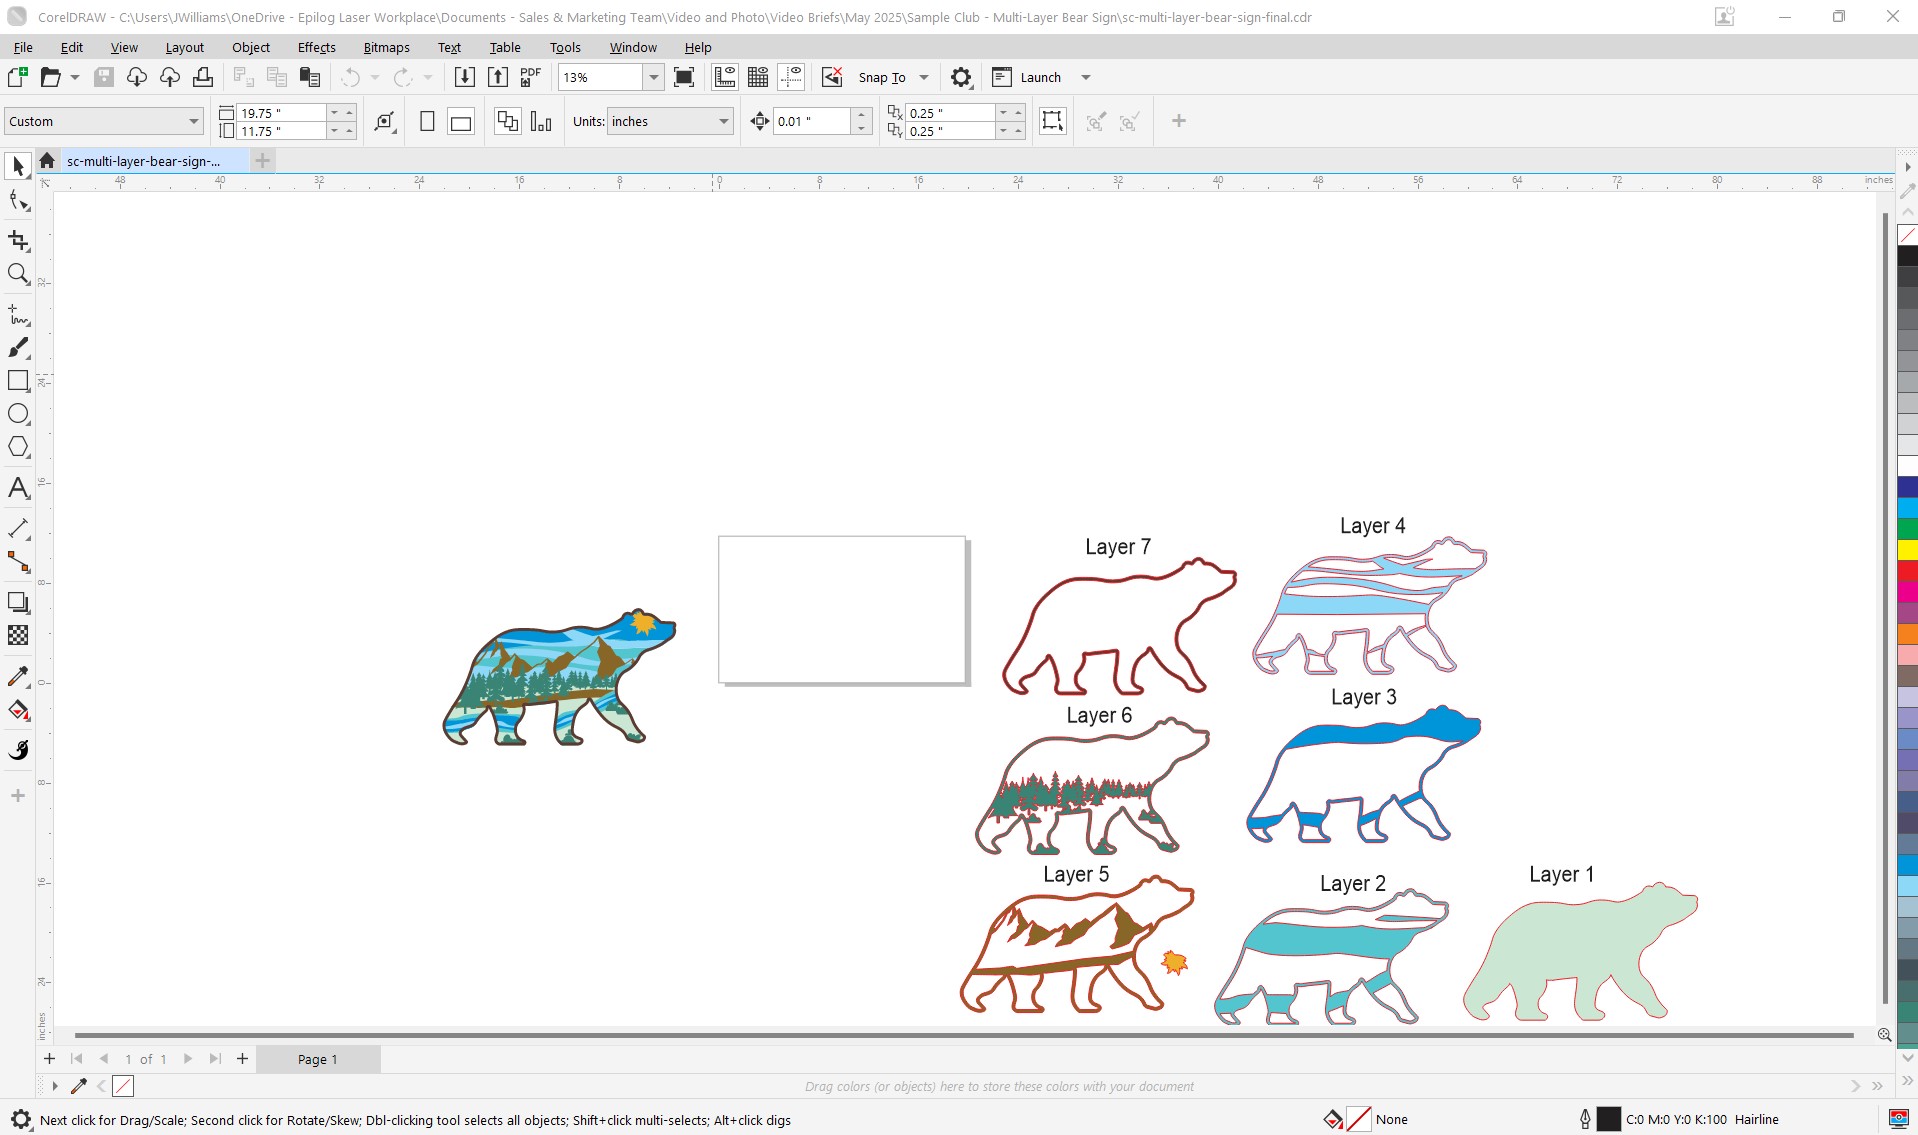
Step 1: Prepare Artwork
To start, in our design software we’ll select our first design. Print the file to the laser, “Selection Only”.
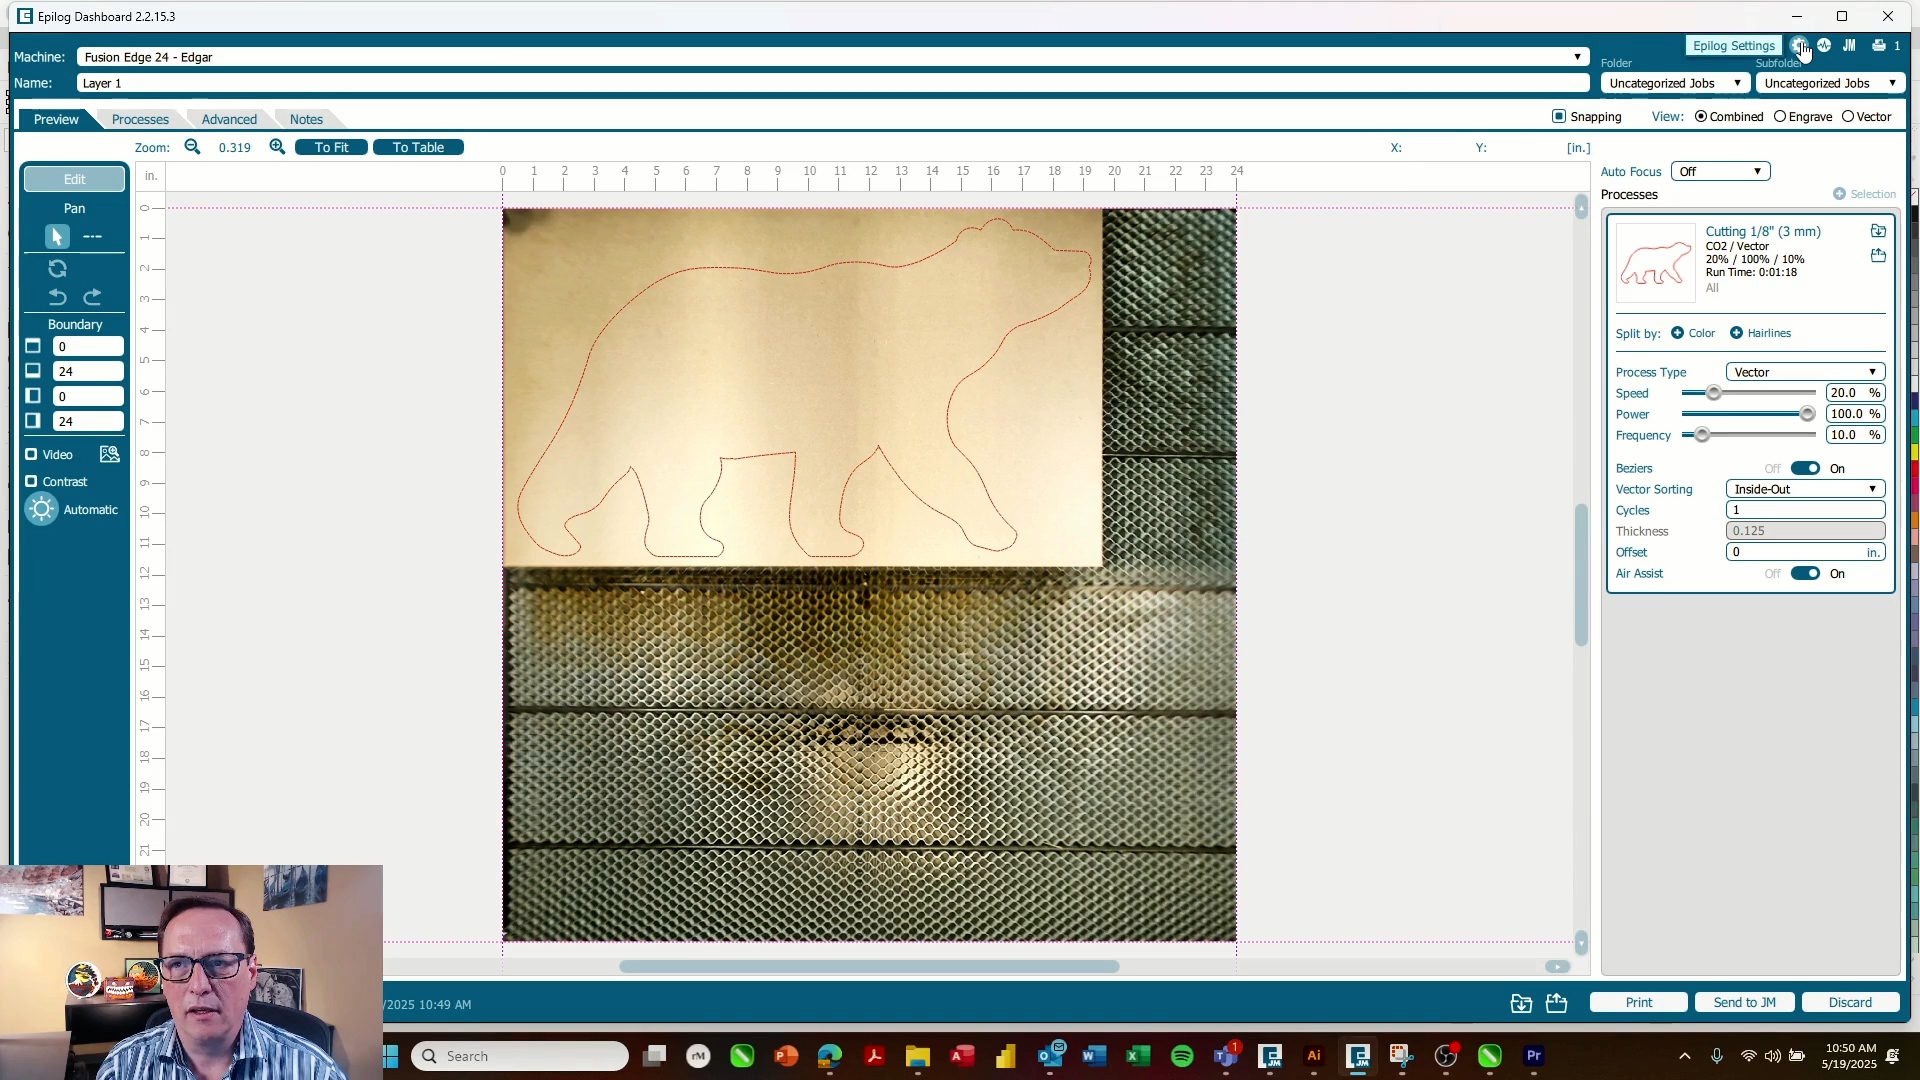
Step 2: Position Artwork in the Laser Dashboard
In the Laser Dashboard, position your artwork, then change the Process Type to “Vector”. Input your laser settings, for this project we are using the preset settings for cutting 1/8″ wood, then slowing down the speed slightly to cut through the layer of tape that will be on the back of our MDF. We are using the settings of 20% Speed, 100% Power, and 10% Frequency on an 80 watt Fusion Edge 24. Name the Layer appropriately before sending to the laser, to avoid any confusion when cutting multiple layers.
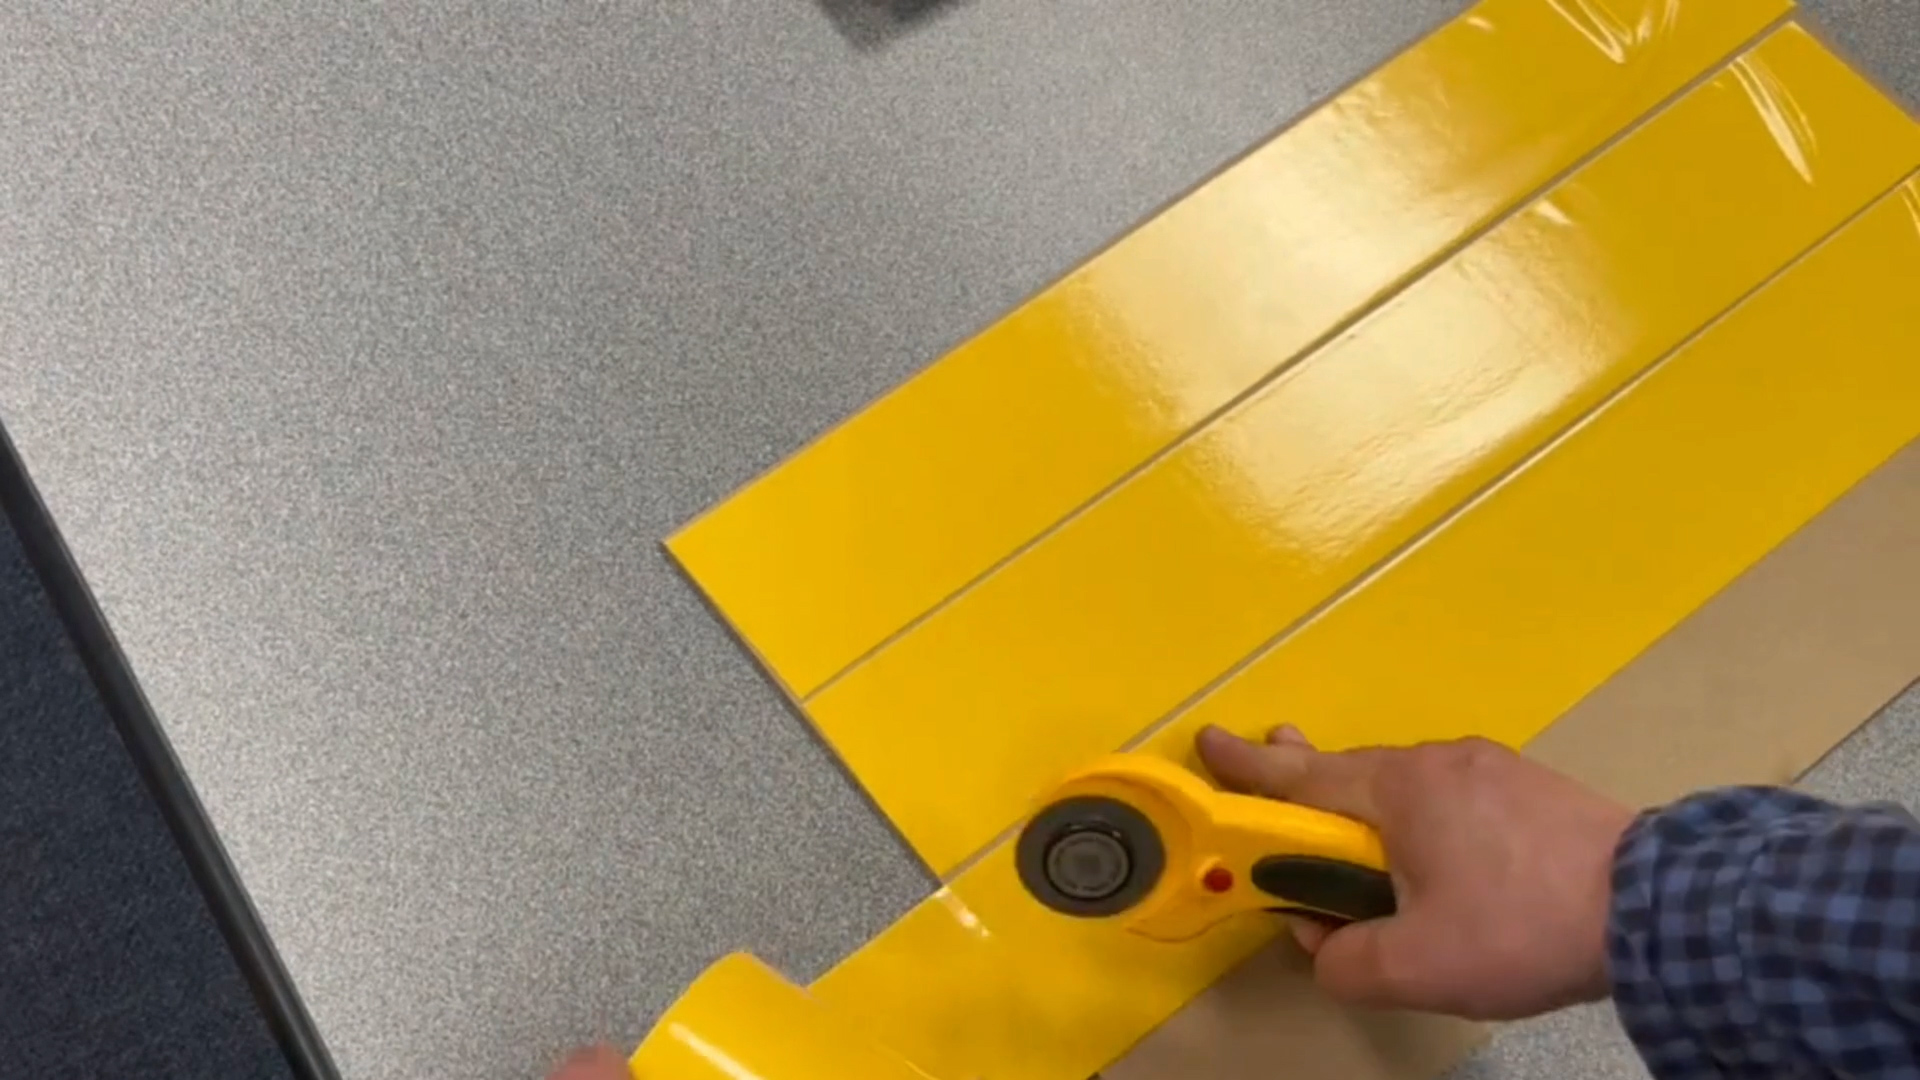
Step 3: Apply Backing Tape to MDF
Apply double-stick tape to the back of every sheet of MDF except the bottom layer, to prepare them for assembly.
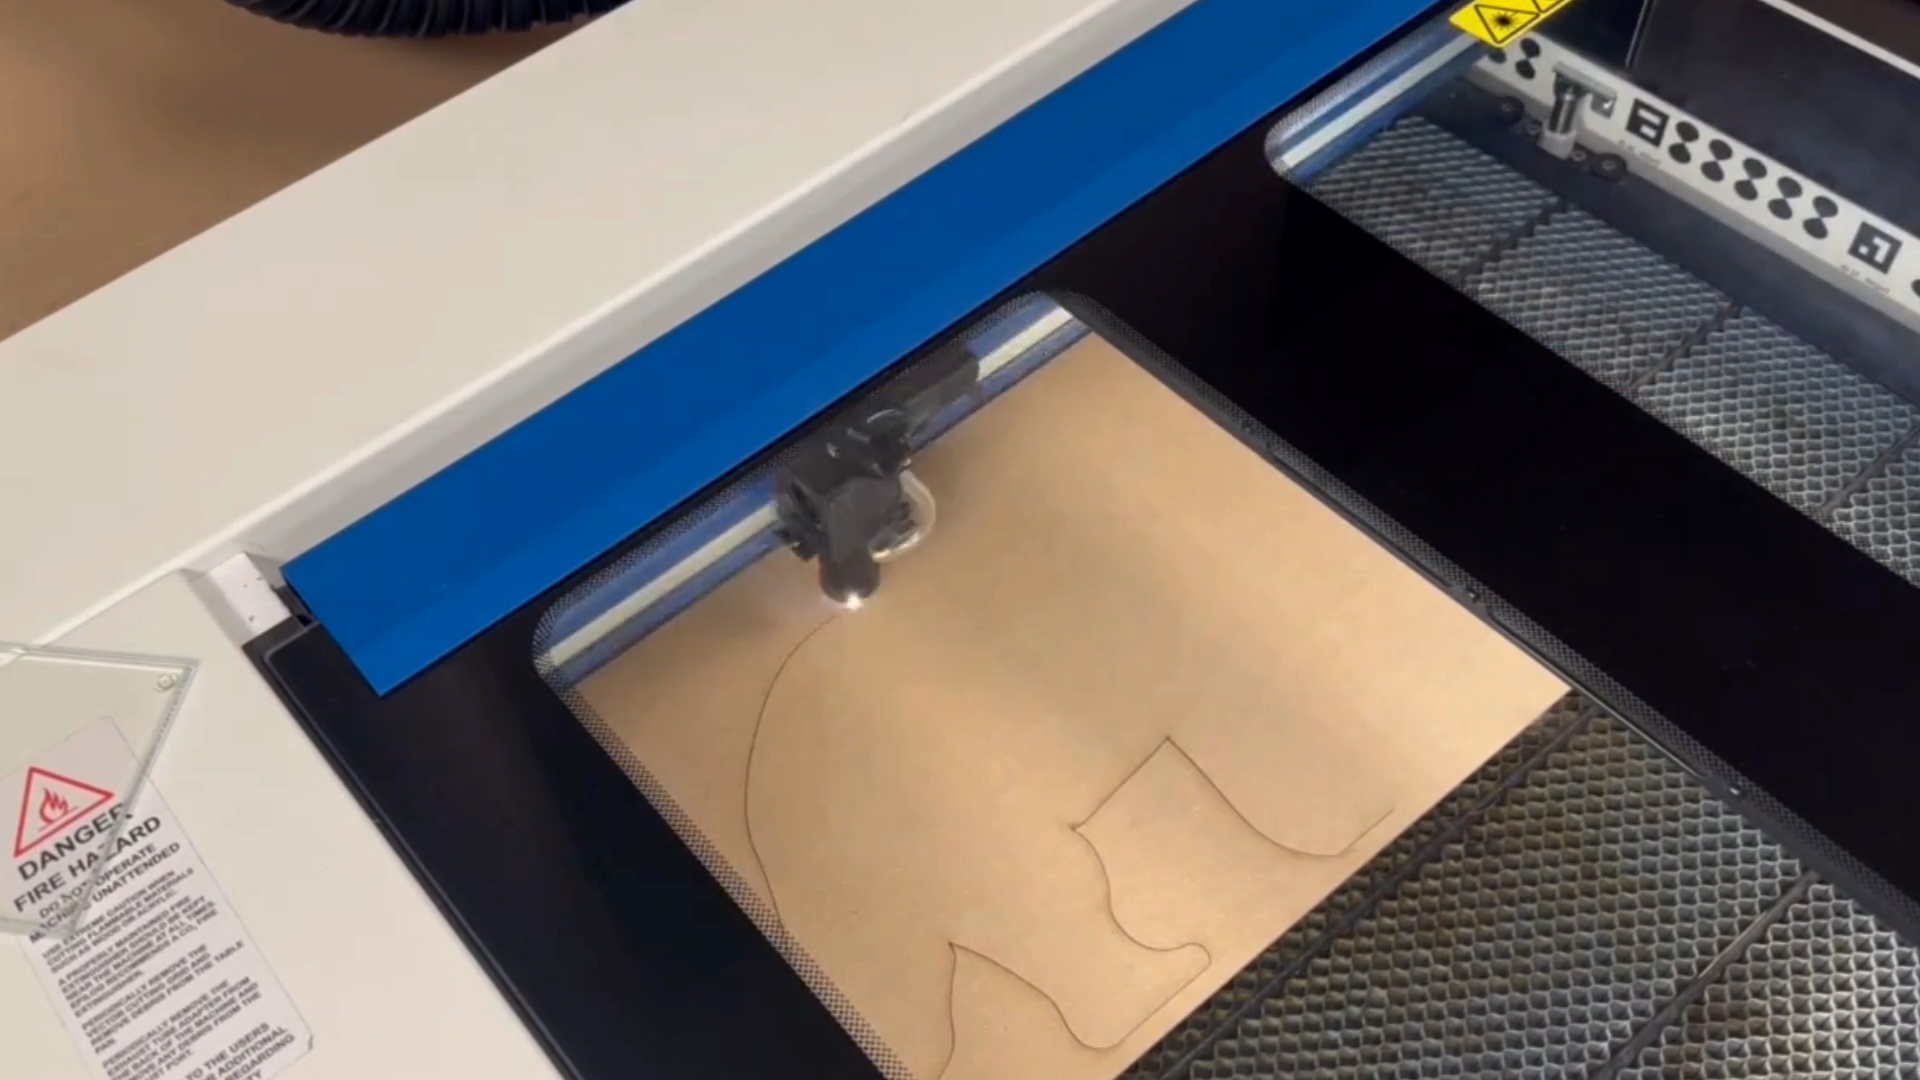
Step 4: Run the Jobs
At the laser, select the first file and press the start button to begin cutting. Repeat with the remaining layers after setting up your next MDF sheet.
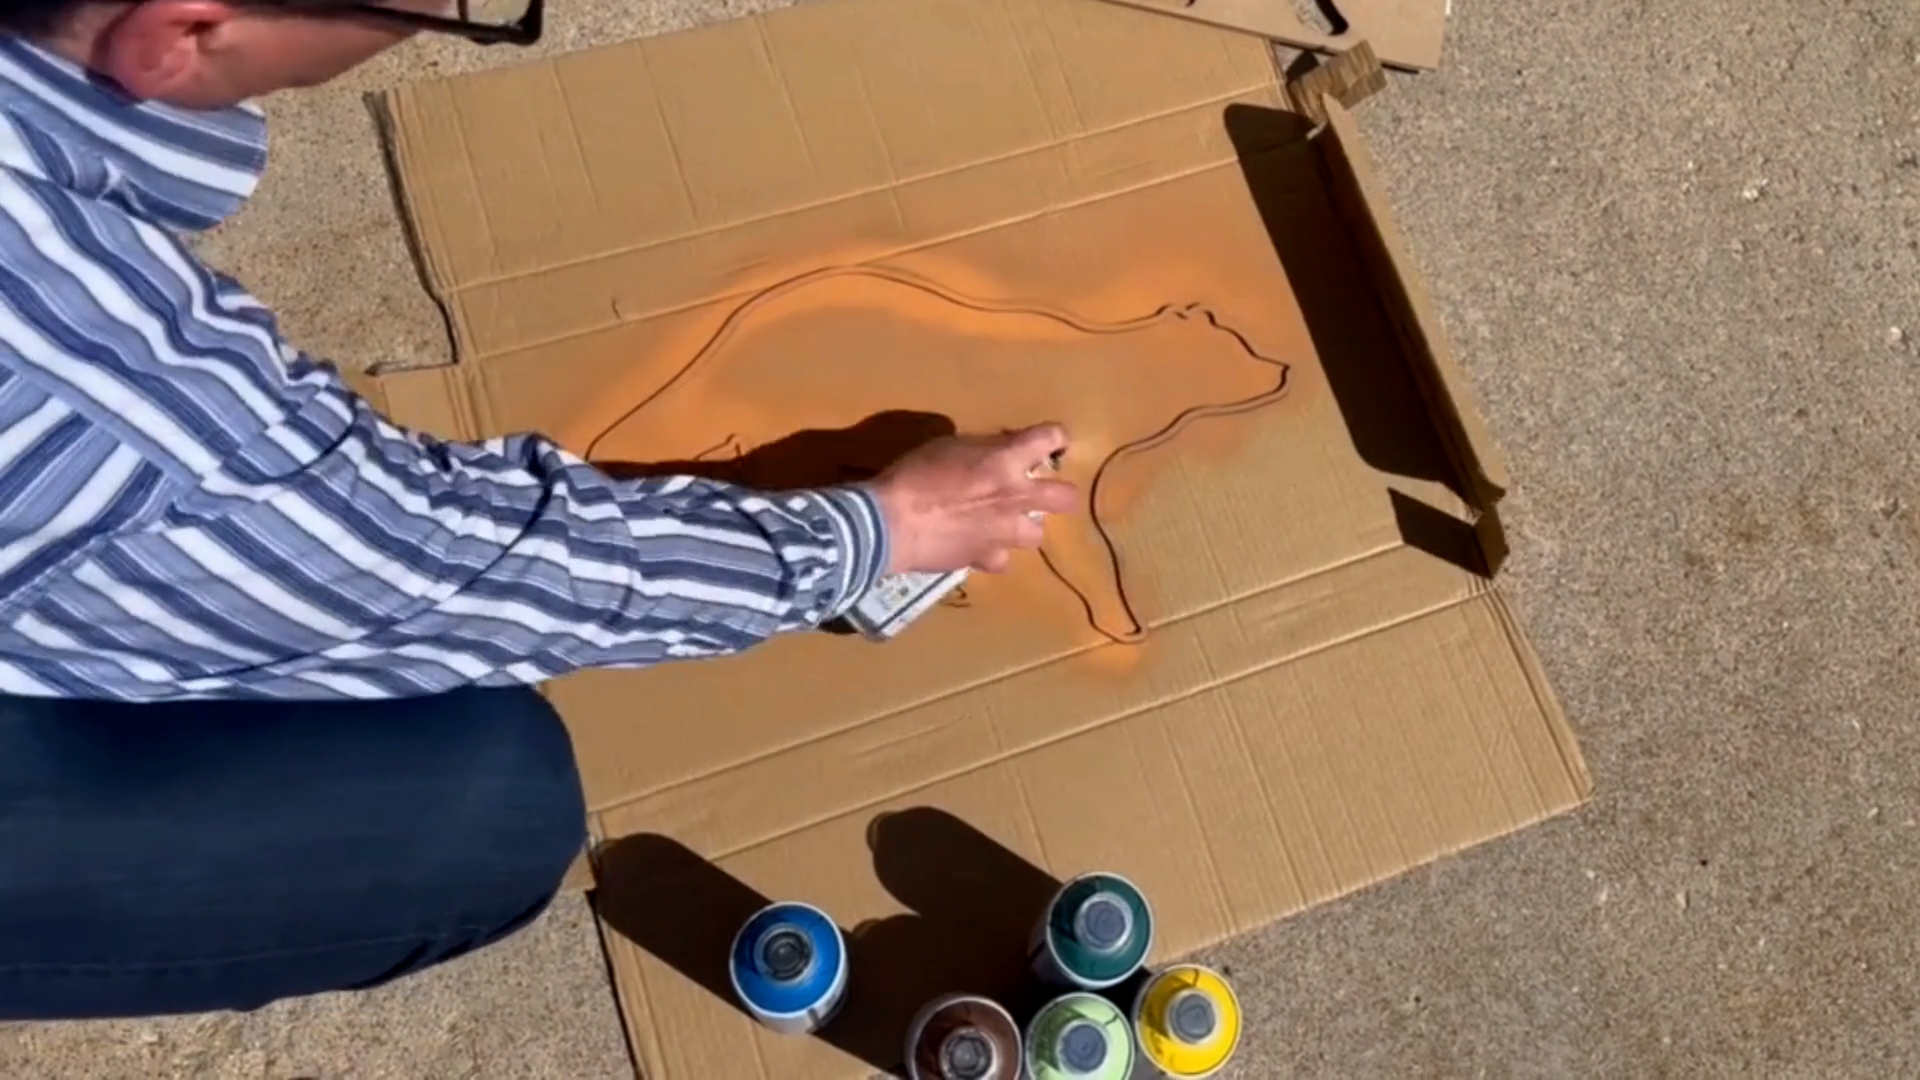
Step 5: Spray Paint Layers
After all of the layers are cut out, spray paint each layer and allow them to dry before assembly.
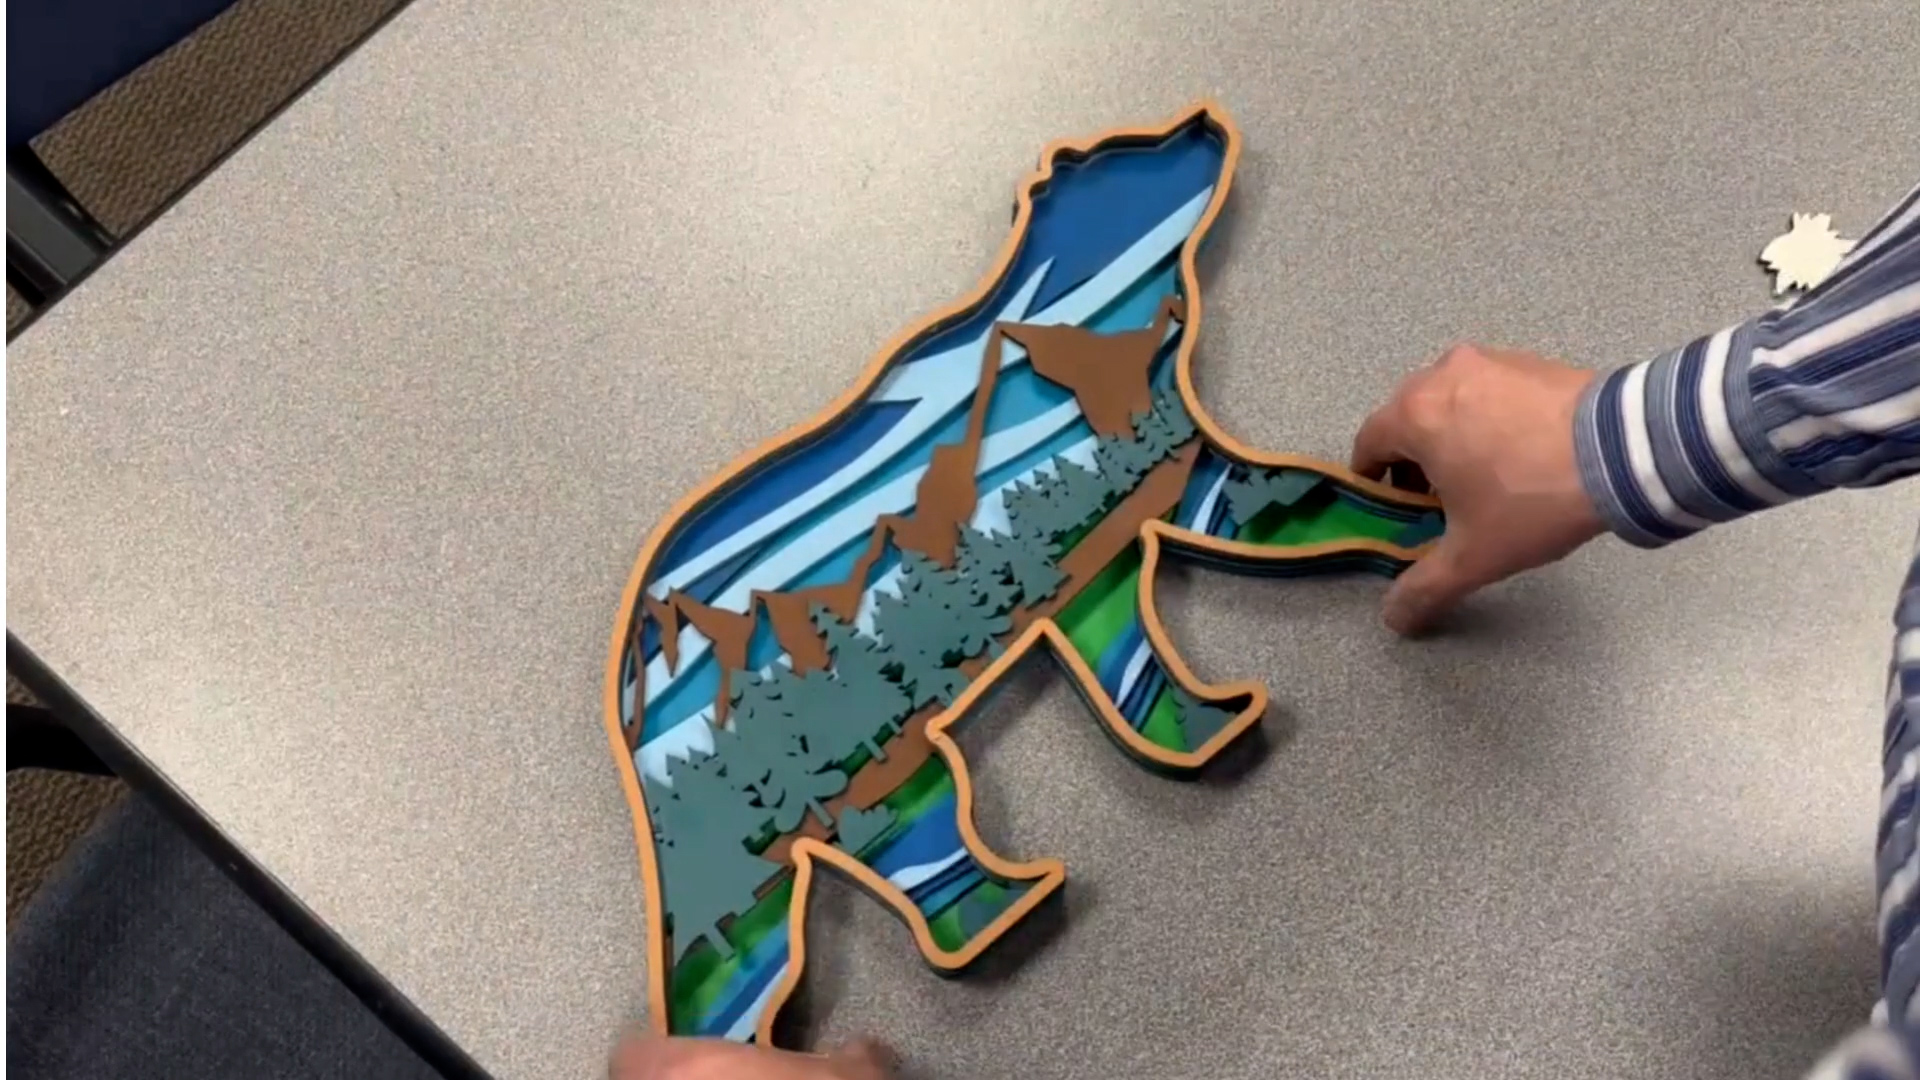
Step 6: Assemble the Layers
Once the layers of your sign are dry, remove the backing tape from each layer and stack them one at a time until your sign is complete!
Where can I sell laser-cut multi-layer signs?
- Etsy
- eBay
- Amazon Handmade
- Facebook Marketplace
- Your Own Website
- Craft Fairs & Artisan Markets
- Local Gift Shops or Boutiques
- Home & Garden Shows
- Instagram & Facebook