
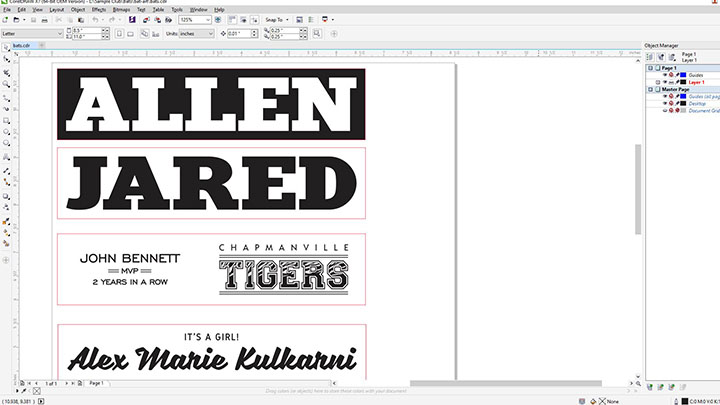
Prepare the Artwork
Download the engraving files and adjust the artwork accordingly. Our artwork is set up for 18″ mini baseball bats. You may need to change the dimensions to fit your piece.
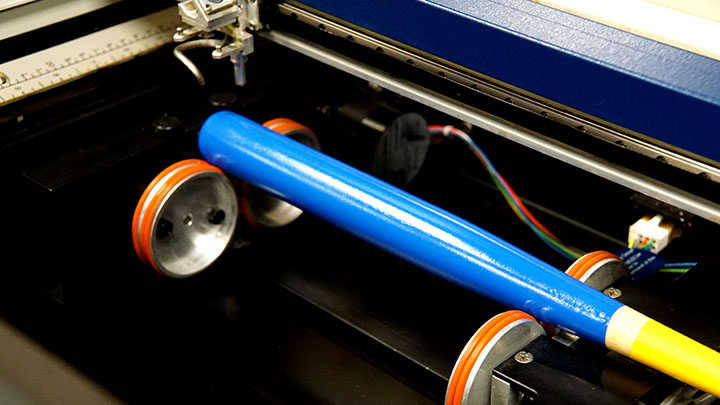
Setup up the Rotary: Lower your engraving table, remove the vector or engraving table, and power off your machine. Plug in your rotary attachment and then restart the laser.
The laser head will relocate to a new home position for the rotary.
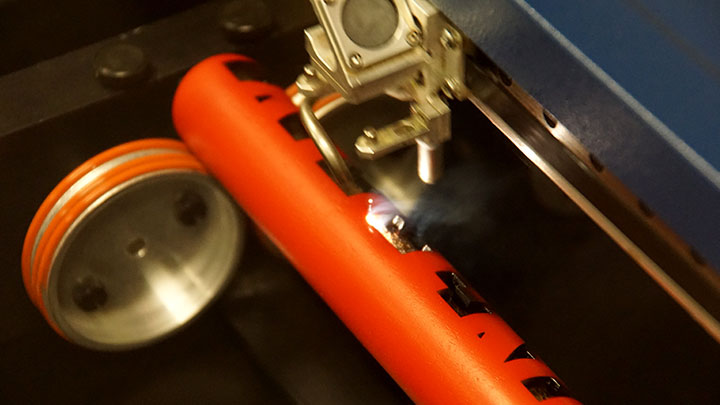
Place your baseball bat on the rotary attachment. Use a level to make sure the piece is level throughout.
Send to the Laser
Once you’ve customized your graphics and your bat is level, send the job to the laser and press GO!
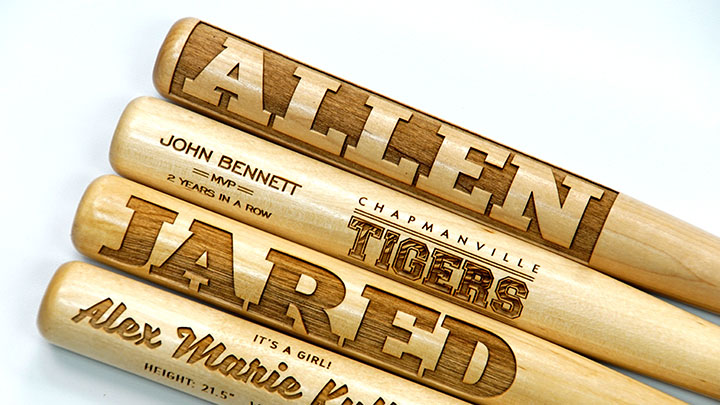
Note: For extra contrast, you can paint the bats before hand, leaving the wood engraving exposed; or mask the bat and then color-fill the engraved portion!
Enjoy
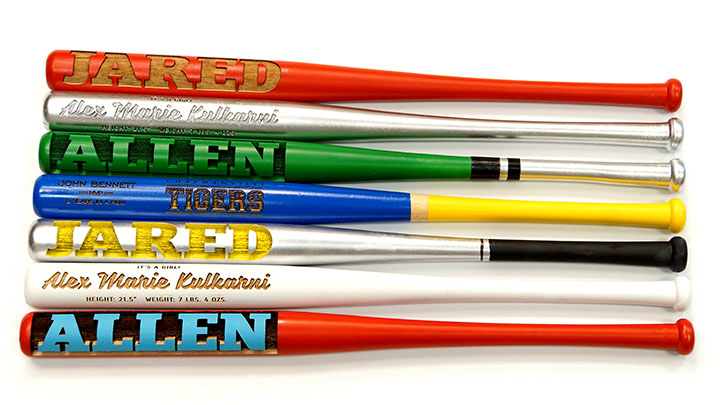

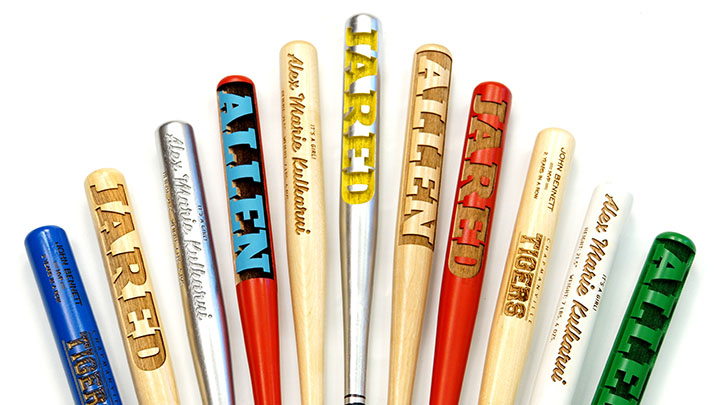
Where can you sell engraved mini baseball bats?
- Youth/academic baseball teams
- Groomsmen gifts
- Birth announcements


